Epic Rag Rugging
(Note: If you click the pictures, they will show their larger form)
A few weeks ago, I stumbled across a tutorial and some videos for making enormous, chunky, rustic rag rugs from sheets. I’ve seen crocheted rag rugs for years, and was never really impressed all that much with them. They looked scrappy (not in a good way), ravelly, and the stitches weren’t pretty. I realize, they were just rugs, and you were going to stomp muddy feet all over them, but still. I like things to look nice.
The rug in this woman’s tutorial was scrappy, but in a good way, and she was using a large crochet hook and loose stitches, which allowed the beauty of the stitches to show. And I decided I could go one better, create a neatly-created project with colors that made sense and went together, and with stitches you could see easily, and therefore, appreciate the beauty of. After having almost completed the first one, I can say I’m hooked. Yes, bad pun.  This rug is super-chunky, thick, and comes together really fast. And it is the most cushy, comfortable rug under your feet. I’m just thrilled with how it has turned out. And when I say fast, I mean fast. I prepared strips, and crocheted a 40″ diameter rug in about 4 hours.
I’m going to include links to Flight of the Pooka’s little videos at the end of this post. I encourage you to watch them if you are a visual learner. Seeing is sometimes better than reading a description. But I’m going to give it my best attempt, with pictures.
First, you need a lot of sheets. I started with six flat and fitted sheets I got at the thrift store. I tried to think about what colors would go together. I ended up with cream, a pretty blue/green/white stripe, a pale grass green, white with purple and green polkadots, and a dark purple. The sheets with patterns actually look great when crocheted into a rug, and you can build off the colors in the color scheme of the print pattern. I will say that even though I used all six sheets, the rug isn’t as big as I want, so I’m keeping my eyes peeled for sheets that will help me finish the project. In the meantime, I’m using other sheets to start new rugs. Also, use cotton or cotton blend WOVEN sheets. Not jersey and not satin or other silkies. Not that there is anything wrong with those, but if you’re going to make a rug using this method, you want woven.
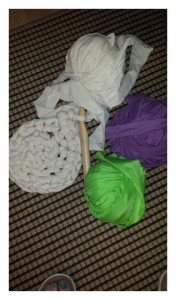 I did figure out pretty early on that if the sheets weren’t queen or king size, they weren’t worth tearing up into strips. You just don’t get much out of a twin or full sheet. I used both flat and fitted, and I tore them, rather than to waste time cutting. I’m lazy like that. Flight of the Pook shows how to tear the sheets quickly and easily, and it’s in her first video. In my case, I went a couple steps further than she did. I cut/tore off the hems of the sheets before I started, because I didn’t want the bulk of them messing up the look of my rug. But like her, I did the tearing while sitting in my comfortable chair, so nothing fancy was required in the way of seating or a table or anything. I snipped the top of the sheet about 3 inches from the edge, then tore the strip to the other end, stopping about an inch before I reached he bottom. I then snipped another 3 inches over on that bottom edge, and started tearing toward the top, again stopping about an inch before I got to the top. I continued this pattern until the whole sheet was torn into one long strip. Yes, it means there is some weirdness where you make that turn, but in crocheting, I found that it really didn’t matter, it came right into the stitches and didn’t show. The Flight of the Pook’s tutorial shows wrapping the sheet strips into a ball, but I found that this
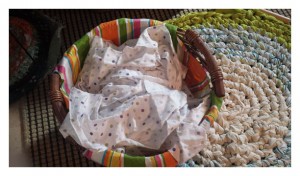 was not only an unnecessary step, but made crocheting with the printed sheets more difficult. In a ball, the sheets came off twisted like yarn, instead of flat, and the print usually ended up inside out, so it wouldn’t show on the rug. So I just tore the strips directly into a big basket. That way I could manipulate the strips to keep them mostly flat, and not twisted, as I went. I wanted those big stitches, and twisted sheets make smaller stitches.
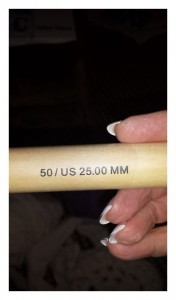 I used my largest crochet hook. I bought it more than a year ago because I was fascinated with its size. I had no purpose for it, but bought it anyway. And there it was, just waiting for me to use it on this project! It is not classified with a letter designation, like regular hooks. The biggest letter hook I have is, I think, a Q, and I use that one all the time. And I think that’s the size hook that most of the rug tutorials suggest you use. Flight of the Pook uses a Q. But I wanted to go bigger. Way bigger. So, 25 mm it is! This thing is as big around as a quarter. I have large hands, so handling it is not really a problem. I like the smooth wood of it, and can grab it in a fist to pull it through a stitch even if the stitch is a little too tight and reluctant. The only way to manipulate a hook like this is by fist, not like a pencil the way you were taught with regular crochet hooks. Using a big hook like this means that every row of stitches is about 1.5 inches deep. This is why the rug builds so fast – the stitches are huge.
To start the crochet, chain 6. Chain LOOSELY. Loose is important, because sheets, unlike yarn, do NOT stretch. If your stitches are too tight, you’ll not only not be able to pull the strips through each stitch, you will find your arms very very sore. Once you have chained 6, slip stitch them together in a loop (pull the slip stitch through the last and the first chain). From this point on, leave the tail (back) facing away from you, so you get the best look on the “front” of the rug. Start single crochet stitches in your chain stitches. You may want to do two single crochet stitches in each chain, to build the circle bigger.
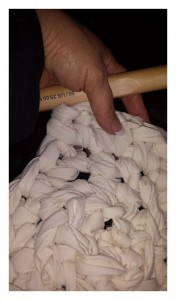 Continue crocheting around the circle. It will start to look like a rug after about four or five rows, and you will have a better feel for how many “extra” stitches you will need to keep it getting larger without curling up like a bowl, or floppy with a ruffle around the edge. The goal is smooth, flat, and round. I am not good at crocheting circles, and found myself with a “ruffle” and had to take out four rows and try again (see picture below). The picture to the left shows some of those early stitches. It doesn’t look all that pretty at that stage, but keep with it, and you will do fine. And you can always rip it out and go back if it isn’t quite right. And like I said, this went fast. I had a 15 inch circle in an hour.
Ruffly rug – had to rip it back about four rows and re-start).
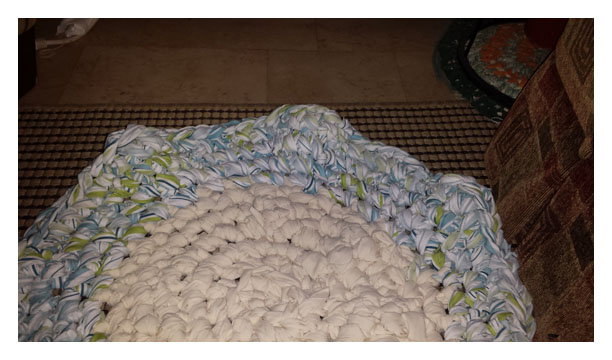 I crocheted until I ran out of sheet, then tore more sheet, tied a very tight square knot to the old sheet, and kept going. Every time I had to tie a knot, I tucked that knot
 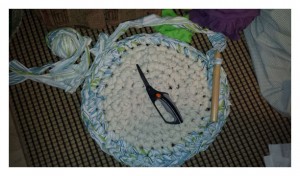 to the back, so it wouldn’t be on the top. As the rug got bigger, I needed fewer and fewer extra stitches. At its largest, I was adding an extra stitch about every 7th or 8th stitch. This means I put two single crochets in one “V” from the previous row. This seemed to work well. As you go, you’ll notice it getting ruffly, or the edge curling up toward you, and that means you need to rip back a few stitches and add an extra or skip a stitch to keep it smooth.
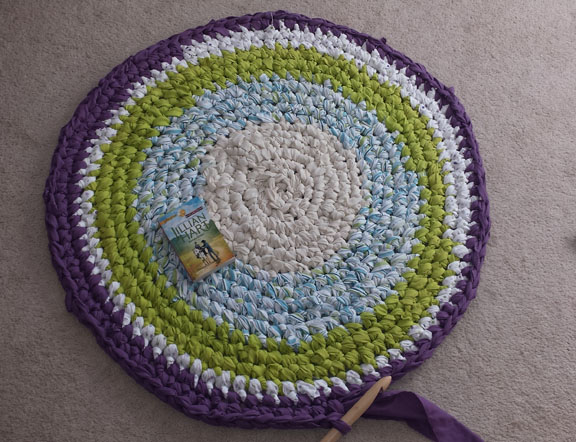
The picture below shows the rug at 40 inches, but I’ve run out of purple. This will be a problem for me as I go forward making more rugs. The purple sheet was a double size, and you can see as you get to the outside, you don’t get as many rows of a particular color because of not really having enough sheet. I’m contemplating taking out the purple and choosing something else, since it looks rather odd the way it is, and I’m not sure that odd look would go away even if I just kept going with another color. Still deciding, but whatever I decide, it will be a king-sized sheet that gets used! (The paperback is on the rug to give you perspective on size.)
 I am loving this project, and have sheets torn for two more large rugs. I’ll be working on one of them while watching football this afternoon. Go Broncos!
P.S. I said not to use Jersey or knit sheets. This isn’t strictly true, they can be used. A friend of mine gave me a big box of Jersey sheets, and I will make rugs from them, too, but you cannot tear them, so more time will be spent cutting them into strips for use. I would not mix jersey with woven in the same rug, however.
Links to Flight of the Pook’s video tutorials, and her original blog on the topic:
Flight of the Pook Video 1 (sheet tearing and getting started)
Flight of the Pook Video 2 (the rug is growing)
Flight of the Pook Video 3 (the big finish!)


This looks like fun and SO practical! Definitely on my crafting to do list.
I wish I was proficient in crochet this looks like an awesome project! My crochet however, is strictly for coasters and dish clothes. LOL