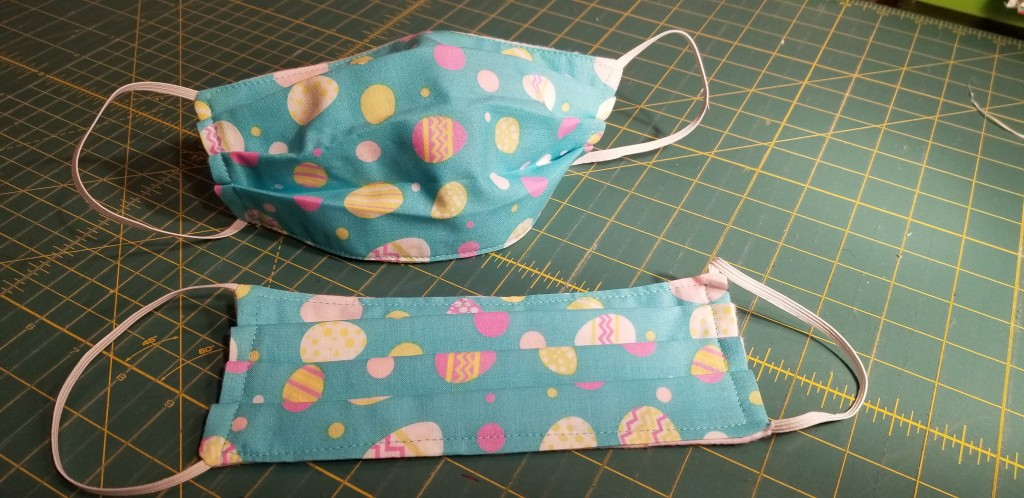
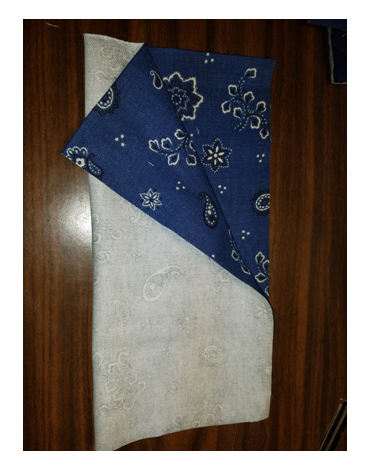
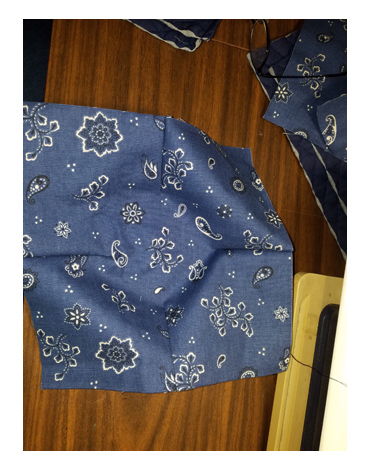
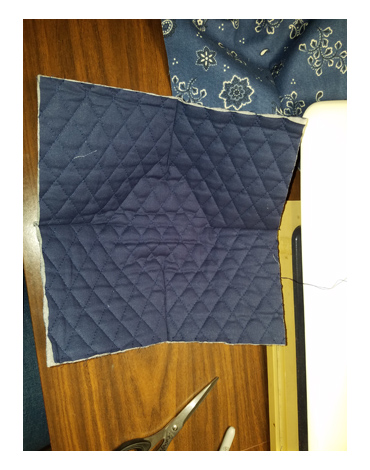
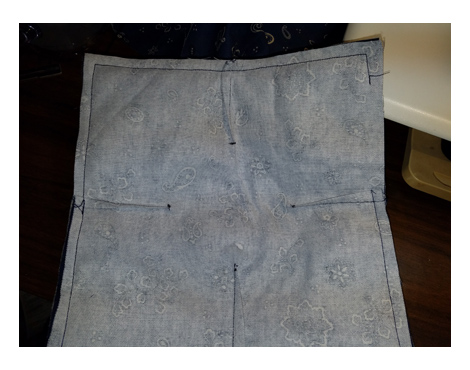
How to Make a Cloth Mask for Self-Protection

Hi all.  I know it’s been forever and ever since I posted here, but these are strange times we are in right now, and with the government now recommending that everyone out and about doing essential business (aka, doing a weekly grocery store run or going to the post office) needs a mask.  We can’t buy medical masks and we can’t even buy paper masks or painter’s masks or anything else.  What are we to do?


cotton face masks for self-protection


If you can sew, even if it is by hand, even if it is sloppy with a machine and you don’t have a lot of experience, you can do this.  You don’t need much, and I’m going to show you how.  My 17 year old daughter, who has never touched a sewing machine in her life, was able to make herself a mask with my instructions.  If she can do it, you can do it!

NOTE: I adapted this pattern from the Deaconess Hospital mask pattern, which can be found here. The site contains the measurements they recommend and a short video on construction.  My pattern is only slightly different, so you can decide which one you want.

You should be able to make a mask in less than a half-hour.

Step 1

You will need at least two pieces of fabric to make your mask.  Pick a sturdy cotton, with a tight weave.  Flannel is great for one of the fabrics because of the tighter and fuzzier weave (less gets through) and because it feels good on the side that will be against your face.  If the only cotton you have is thin (you can easily see light through it), you can double or triple the layers to get a better effect.  These instructions assume you are using two layers of fabric, so you may need to adjust a few steps if you are using thicker fabric. You will also need two lengths of elastic, size 1/8 or 1/4″ wide.  If you do not have the right size elastic, you can split a wider piece into a suitable size.  Soft elastic is best.  Here are the measurements you will need for your mask:

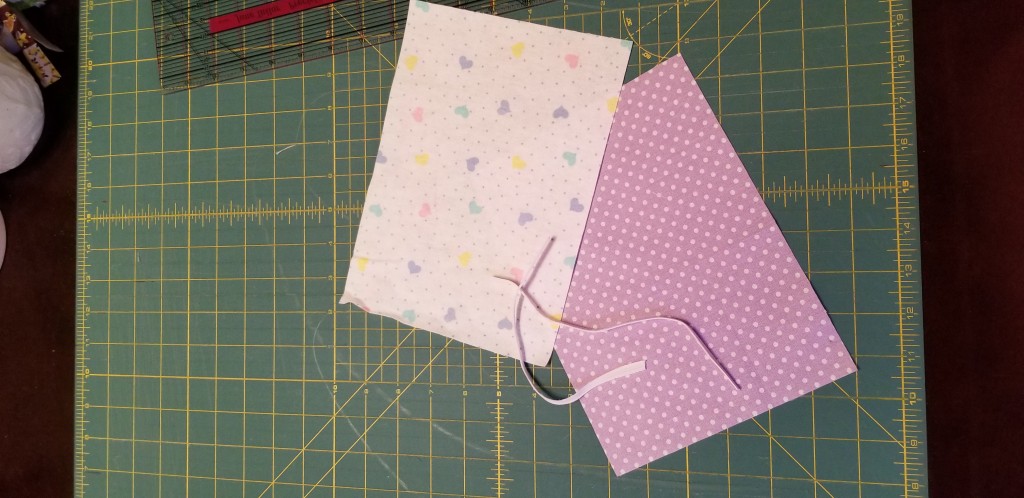
  • Cut 2: cotton calico, lightweight cotton canvas, flannel, etc. into rectangles that measure 6.5 x 9 inches.
  • Cut 2: elastic, 7.5 inches if soft, 8 inches if stiffer.

fabric squares and elastic in the size you need for your mask

Step 2:

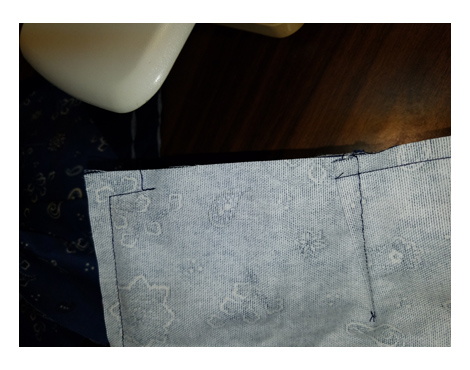
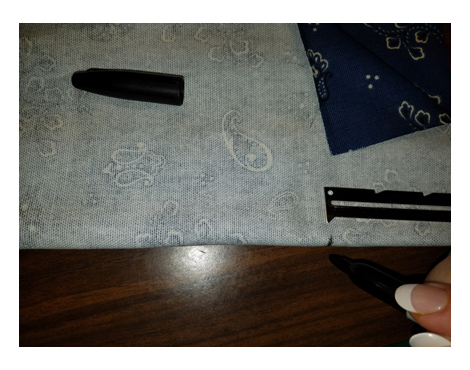
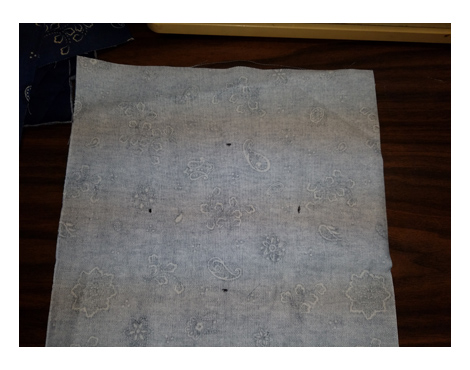
Place fabric right sides together.  With a pencil, measure about 3 inches from the top of one of the long sides and make a mark.  Move down another 2 inches and make another mark.  This is the place you will NOT SEW so you can turn the square right side out after you are done stitching.

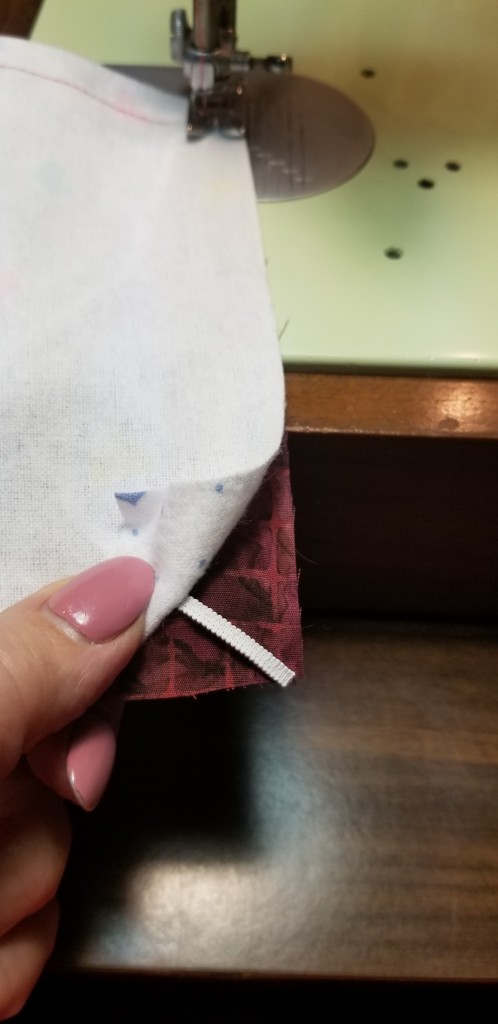
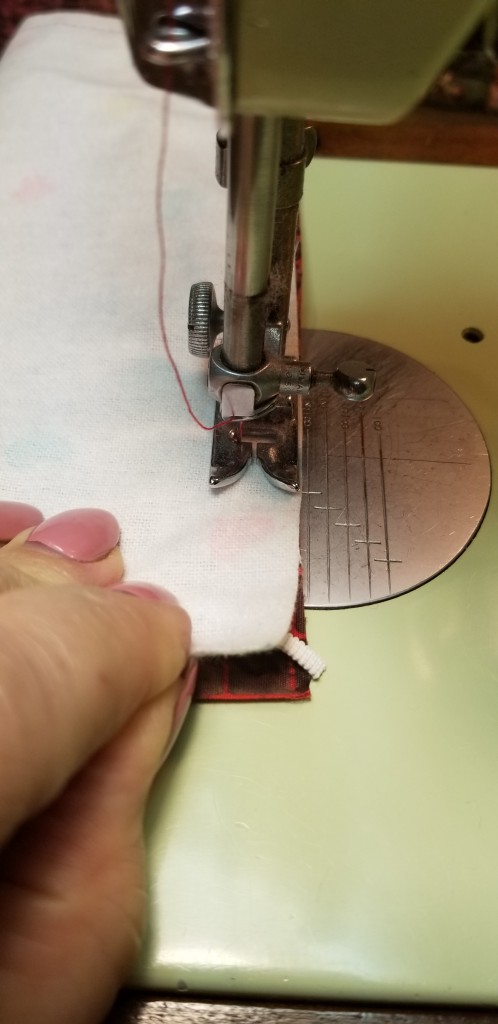
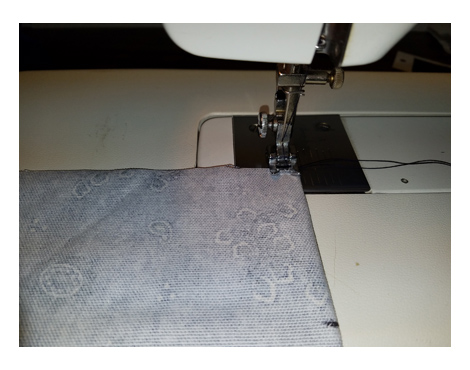
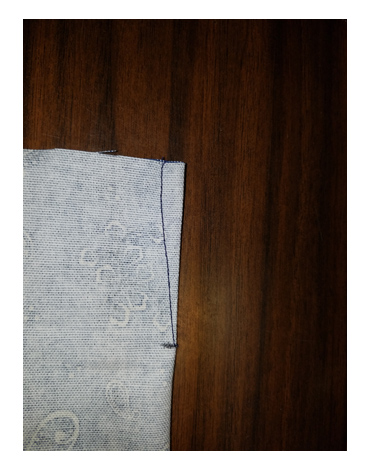
Using a 3/8 inch seam, back-tack at the second mark (sew 3 or 4 stitches backwards, then sew to about 1 inch before the corner.  Stop stitching and lower your needle through the fabric to hold it in place.  Flip up the top piece of fabric to keep it out of the way.  Place the end of one piece of elastic at a diagonal at the corner of the bottom piece of fabric.  Flip the top piece of fabric down to cover the elastic.  Continue to stitch, holding the elastic in place with your finger, until you have sewn within 3/8 of the end.  Make sure you catch the elastic in your stitching.

elastic in place at corner.elastic at corner

Lower your needle to hold the fabric, lift the feed dogs, and turn the fabric 90 degrees so you can continue to sew around the rectangle.  Stop about 1 inch before you get to the corner.  lay the other end of the elastic at the corner, as you did with the first corner, making sure the elastic is flat and not in the way of your need.  Continue to sew to the corner, again catching the elastic in your stitching.

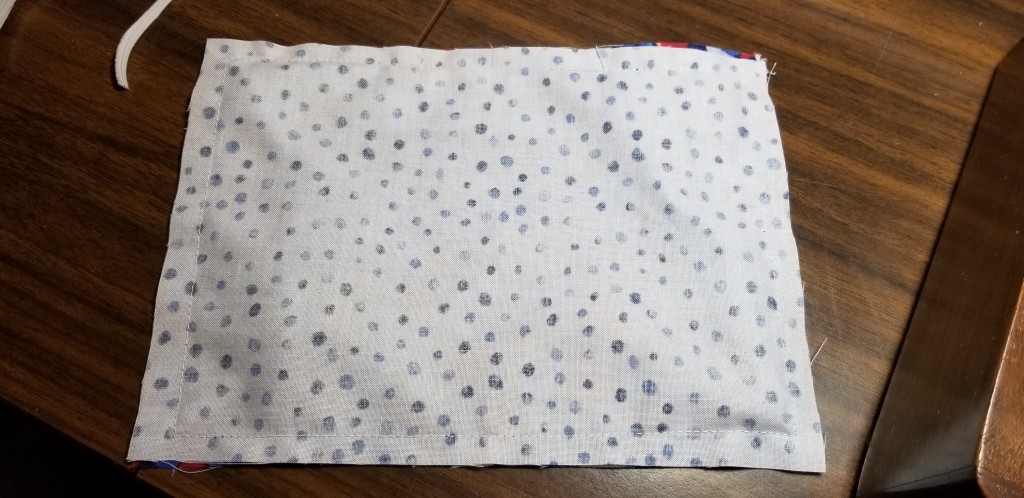
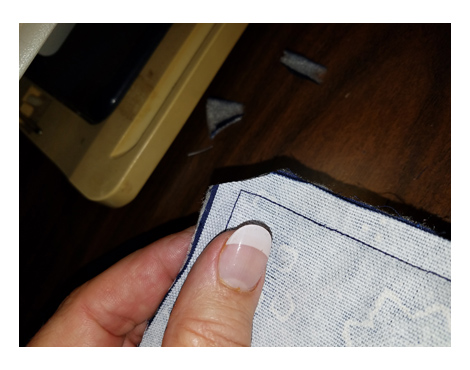
Lower the needle to turn 90 degrees to the next side.  Repeat the above step with the next two corners. After you make that final corner turn, sew ONLY until you reach your pencil mark.  Back tack to lock the stitches (put your machine in reverse and take 3 or 4 stitches backwards.

sewn rectangle

Step 3

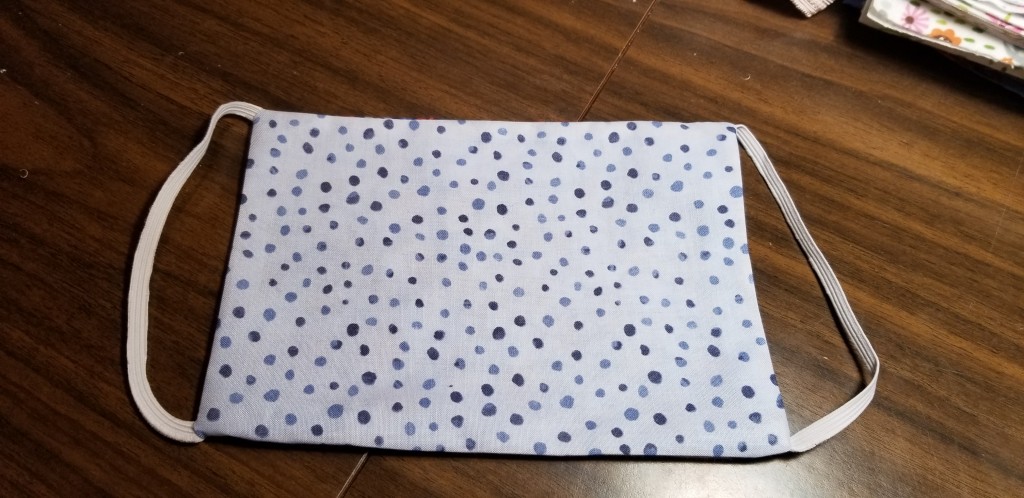
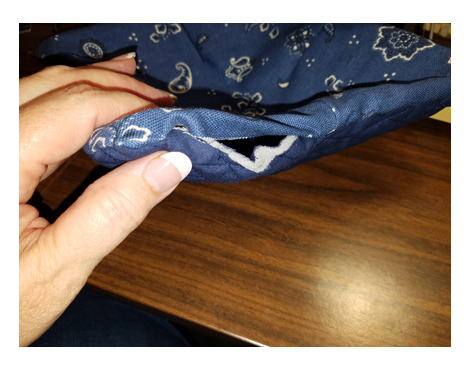
You will have a completed rectangle that is inside out.  You will need to turn the fabric right side out through the hole.  To “pop out” the corners once you have the fabric rectangle turned right side out, tug gently on the elastic to pull those corners outward.

Press your rectangle.

rectangle right side out

Step 4

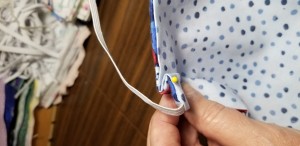
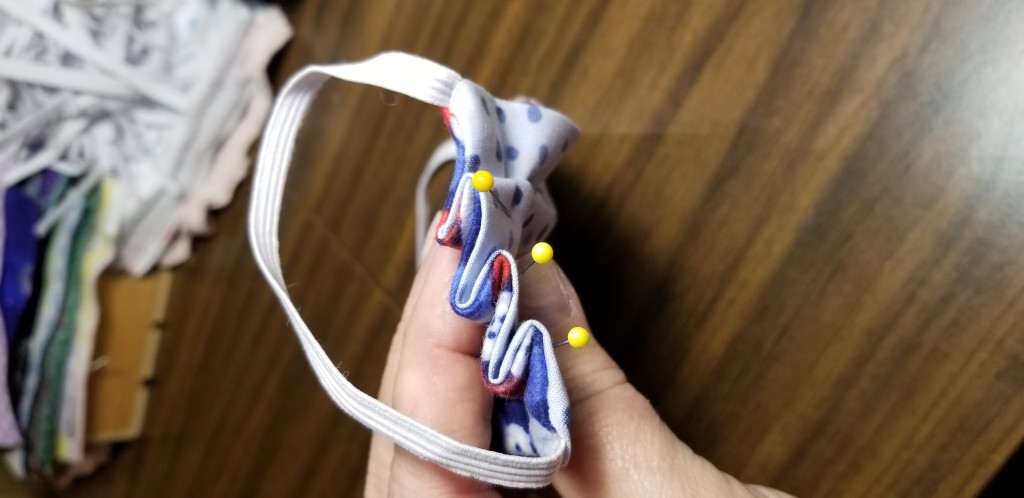
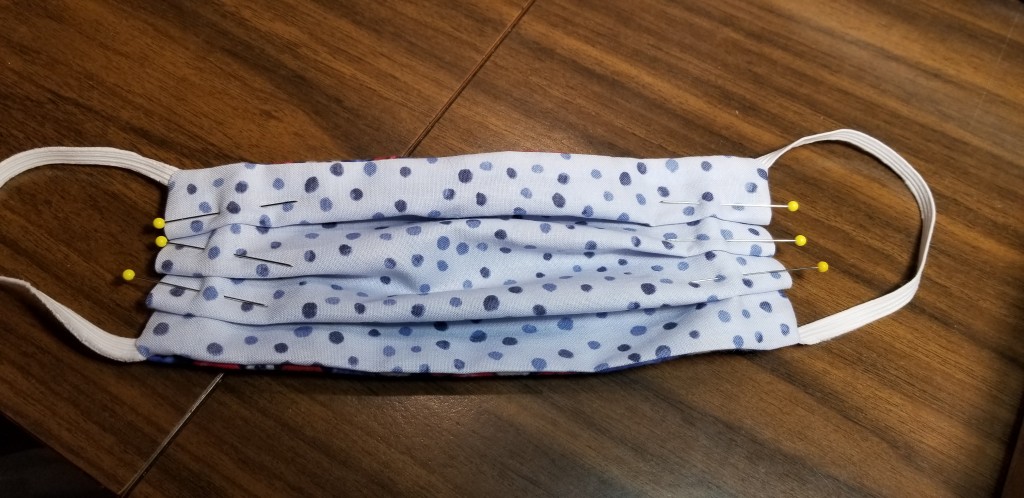
Now you will be making three pleats on each of the short sides of the mask.  This gives it the shape it needs to fit your face properly.  You may have to pin several times to get it right.  Fold one pleat near one edge, and pin.

20200403_17521920200403_175246

Pin a second one, and then a third.  You want to be sure that all three are away from the seam at the long edge of the rectangle.  Repeat on the other short side of the rectangle.  Be sure your pleats on both ends go the same way.  To see that they are right, lay the mask flat and make sure you can fold the pleats neatly from one end to the other.

20200403_175348

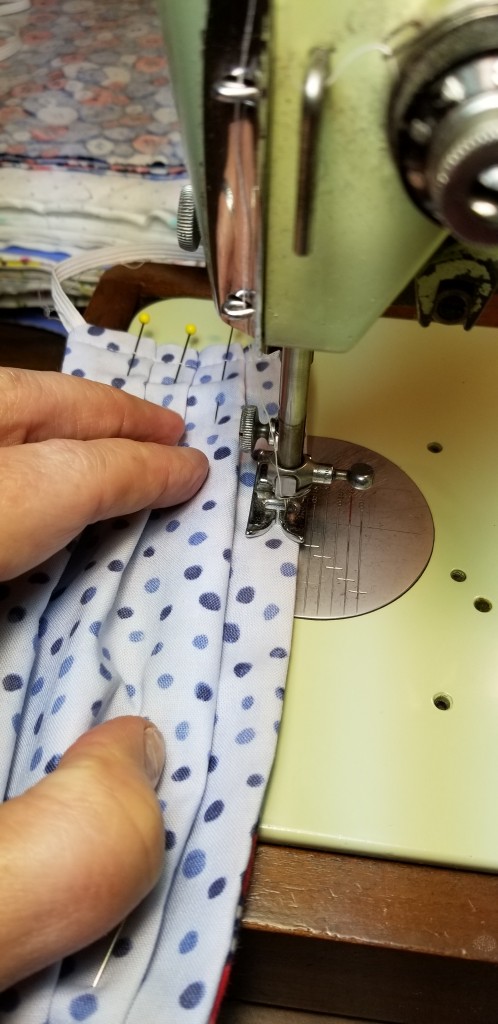
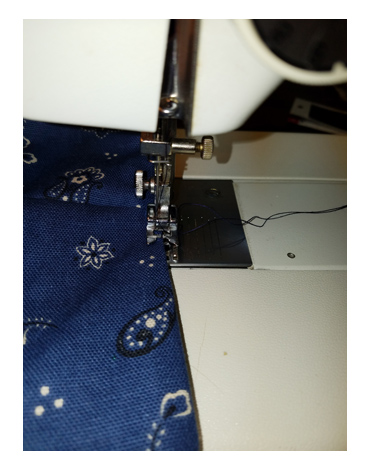
Starting at one of the short ends, you are going to want to top-stitch about 1/4″ from the edge.  The fabric is thick on the ends, so move slowly with your machine.  You can pull the pins as you get close to them, or sew over them, depending on your machine.

20200403_175530

When you are finished top-stitching, snip your threads and remove the pins. Flatten the mask to make sure the pleats look good.  Press.

That’s it!  You did it!

~~~~~~~~~~~~~~

My crafting business, Patchwork Chicken Studio Art and Home, is busy making masks upon request for an organization that is supplying them to local nursing and care centers.  While we are handing out a few here and there to those that need them, our concentration has been on making masks for this larger cause.  We are making these for free, using fabric and materials from our stash.  This is a labor of love.  We hope you’ll head on over to our facebook page and give us a like and some love.


facebook cover photo singer


Posted on April 3rd, 2020 by Momilies  |  Comments Off on How to Make a Cloth Mask for Self-Protection

It’s Been a Year

santa and mrs claus ornamentI haven’t blogged since April.  This is a sad commentary on where my mind and heart are right now.

2017 was quite a year.  I hope to never repeat one like it.  Ever again.  It’s been a year of daily tears, daily scares, daily feelings of discomfort.  And it isn’t all about politics, although I can honestly say some of my funk is from that.

For those that may not know, Klown and I separated (my choice, I’ll be clear about that) October 2016.  I had originally held out hope that therapy would help us fix our marriage, but he didn’t have that hope, I guess.  He moved on, fairly quickly, and in September of this year, moved back to Missouri.  Tater is suffering, and I am thankful I can afford to get her the therapy she needs.  In the meantime, I maintain a friendly relationship with Klown so as not to alienate her any further.  And I am working hard on myself, trying to figure out my new normal, and where I go from here.  There are days when it feels like all this happened last week, and days when it feels like it was years ago.  I am broken, and daily tears have become a fact of life for me.  So many reminders still exist to prick my heart – like the Mr. and Mrs. Claus ornament pictured above.  We were married for 18 years, and much of our persona is wrapped in our “couple-ness.” Without that, I feel empty and aimless.  One would wonder why I chose to separate, if this is how it makes me feel.  Those who know me well already know those reasons.  A couple cannot be a couple if both parties aren’t in it for the health of the relationship.
But I continue onward, because ultimately, I’m a survivor and being busy is the key to my mental health.  Tears be damned.

I grew a lot of vegetables this year, more than we could eat, which meant the neighbors benefited.  I had no major pests or issues, but planting season started late (June instead of May) and I didn’t get good production until August. This does not deter me.  Every gardeners’ motto is “There’s always next year.” My flower gardens suffered from the drought, and I hope the perennials will recover.  The shade garden did fine, fortunately.

My craft business is limping along.  It is my first year, and I know that it will take a while to find my niche and be profitable.  The things I thought would sell haven’t sold.  The things I did on a whim but thought wouldn’t sell, did sell.  I’m still expanding inventory, finding new things to try.  The craft business is pretty finicky.  I’ve not sold but three things on my Etsy store in a year, but I’ve sold lots at fairs. And some fairs were a complete bust.  More bust than not, actually.  I still continue to learn, and interact with local crafters, asking lots of questions, looking at what other people sell and figuring out where I fit.  It is hard work, which I expected.  The best fairs were the ones I did in the fall.  No real surprise there.  My best fair was in early November.  I will keep going for at least another year.

My day job is still what it is.  I’m annoyed by it about 75% of the time, but my students are great and this is how I keep focused and keep going.  8.5 years or less until retirement.  And as I get closer to that magic date, I start thinking about were I will go, what I will do.  I will have to return to Missouri, as the cost of living here is insane.  Also, I will need my family near me.  I don’t have the support system here that I have there.  As I age, my brothers and I get closer, not further apart.  When we were kids, we fought like dogs.  Now, we have so much in common, and so much care for each other.  It is a wonder to see.  This past year’s emotional upheaval has led me to be more introspective, but also a lot more homesick.  And I’ve never been homesick in my life.  But this is probably not a bad thing.  It forces me to make some definite choices in how I spend my remaining years in Colorado.  What haven’t I seen or done, that I need to see or do?

I was very blessed to be able to travel home twice this year, and to have family visit more than once.  My brother, his wife, and two of his grown kids were just here after Christmas, for some skiing and sight-seeing.  It was wonderful to have them, and I got to cook wonder foods and spend time with the people who are closest to me.  It doesn’t get much better than that.

I am hoping that the new year gives me a new turn of the page.  Less tears.  Less homesickness.  Less of all the things that have made this past year so hard.  I will heal.  Crafting, cooking, and work keep me busy and my mind occupied, but also brings me some measure of peace.  There is still a long road to go until I will be healed.  My focus has to be on Tater, on making sure both of us are safe and secure.  We are not suffering financially, for which I am exceedingly grateful. But our house feels strange, our routines feel strange, and especially the holiday felt strange.  They may feel strange for a long time to come.  But as long as we are moving forward, I will feel like we are getting there.  Wherever “there” is.

I wish everyone a successful New Year.  My best advice right now is to turn off the news and find something to do that brings you joy or peace or both. Blessings.

Posted on December 31st, 2017 by Momilies  |  5 Comments »

What I’ve Been Up To

messy studioI’ve been busy.  I don’t know how not to be.  There is always so much to do, and I don’t believe in sittin’ around with nothing to do.

So I’ve been crafting.  I did my first real craft show the first weekend of April.  I laid out my wares in what I thought was an attractive way, pasted on my best smile, and tried to sell things.  I didn’t sell things.  Neither did too many other people, as it was a perfect storm:  first time event with an unknown/untested audience, and predicted very bad weather including snow and sleet (which never materialized).  I sold nothing.  I didn’t make back my booth fee, I didn’t make back the cost to set up my business and my display, or the cost of the materials and time it took to create things.

I’m trying to keep a positive attitude, however, and have two more fairs coming up that I hope end up being good for me.  There is a huge learning curve in this business – the things I sell may be better suited for different markets, with different attendance.  Or maybe I need lower end.  Or maybe my prices are too high.  It really is hard to say, and I’m told the first two years are all about finding the right market for the product, and what time of year works best.  So, I will keep at it.

One of the reasons I shared the picture above is to show part of my process, but also what drives me insane.  Crafting is messy.  Things need to stay out, lay out, finish drying, be ironed, be starched, etc.  This means that every available flat surface ends up being covered.  I have no room to move or do anything until a project is finished and the leftovers are put away.  If a particular thing, say, a quilt takes me the better part of a week to create, then I have a space that makes me crazy for a week.  Even if I put things away as I go, there are still things that need to stay out.  Like the ironing board.  I have to iron the fabric before I cut it.  Then once I have cut it, I sew the squares together into long strips.  Then I have to iron those.  Then I sew the strips together to get the quilt into one piece, which then again requires more ironing.  I can “sandwich” the quilt (put the backing, batting and top together and pin it to hold it until it gets quilted), but then I have to cut and iron the binding material, which will get attached to the quilted quilt.  Then I can finally put the iron and ironing board away.  This process takes about 8 hours over a several day period, and in my small sewing space, I’m dodging the ironing board the whole time.  I am also moving between sewing machines as one is good for one thing, but another is good for others.

It is definitely easier for me to work in the craft room (which I am calling a “studio” now that I’ve made a business out of my crafting) if it is relatively neat and tidy.  Having things laying about makes me feel uncomfortable.  So the sooner I can put some things away, the better. Covering up sewing machines that I am not using helps too – they look neater that way and I’m not worrying about them getting dirt and lint in their working parts over the course of the project.  Even if I had bigger space, I don’t think it would be any better – I’d just have more space to spread stuff out on.  I know myself pretty well by now. LOL

If you’d like to see what I’m making and selling, hop on over to my Etsy store.  The link will take you straight there.  There are also the dates of the next few shows I’m doing, in case you are local and want to come by and say hello!

Patchwork Chicken Studio


Posted on April 21st, 2017 by Momilies  |  1 Comment »

The End of Magic

(Admin note: ANY negative comment regarding perceived animal abuse or showing glee at the demise of Ringling Brothers Barnum and Bailey Circus WILL BE REMOVED.  If you can’t say something nice or helpful, then don’t say anything at all.)

This week, the world found out that one of the longest running circuses ever (over 140 years) will be folding up its (figurative) tent at the end of the current season in May.  Ringling Brothers and Barnum and Bailey are closing up shop.  Literally thousands of people will be losing their jobs and livelihoods, their lifestyle, and their homes.  Families will be uprooted and left dangling in a world that doesn’t understand them and has no place for them.  So not only is a multi-generational entertainment institution committing suicide, but whole families will have to figure out how to live life outside of circus.

This probably sounds a bit odd to most of you.  You grew up in a house, with siblings, and your dad and probably your mom had a regular job that they left the house to do.  You left your house to go to school, played some intramural sports, visited the library, went to church on Sundays, mowed the grass, and did all those mundane things that make up American life.

Circus is not just a bunch of performers traveling around for a few months a year, doing their thing, then heading home to a white clapboard house somewhere with a garden and a dog.  Circus is a complete lifestyle.  It is a job, a home, a place you raise your kids (right into the business).  A circus is a closed, somewhat utopian community of people all working toward the same goal – entertaining whoever buys a ticket to come inside the tent.

For those that have never seen behind the tent, in the “back yard” of the tent, this may not make a lot of sense. But there are circus families who have literally never known anything else.  The adults were raised in circus, and their parents were raised in circus.  Naturally, their children are raised in circus, too.  In circus there are 100 mothers, and 100 fathers, and more siblings than you can shake a stick at. Families in circus work as a collaborative; when the parents are performing, the babies are being tended by other members of the circus family.  Children begin training to perform when they are toddlers; most settle into some sort of performance art after trying several.  They may perform multiple arts.  A trapeze artist can also be a high-wire walker, a girl on the lyra can also work the silks or be a contortionist.  Rigley artists can also be tramp artists, and clowns can be acrobats.  The same girl who rode the elephant or elegant Percheron horse in the opening spec(tacular) may also be the girl balancing on top of a teeter board or juggling during another act.  The beautiful blond woman in the sparkly dress with the trained dogs may also be the person doing facepainting during the intermission.  Those who don’t go into performing can find their own work in the circus.  Someone needs to sell tickets, do the accounting and payroll, put up the rigging, move the props, care for the animals, keep good food cooking in the cook tent, and go ahead of the circus to do publicity and manage permits and locations.  No one in circus (unless they are a huge star) do only one thing.  The circus runs because everyone works, everyone can perform multiple duties, and the “show must always go on.”

My heart breaks for these families.  Imagine a man who has spent his whole life on the high wire, teaching his children to do the same, who now has to find a “regular” job.  Imagine that man working at the local hardware store selling nails and screws and boards, or in an office trying to sell insurance.  Imagine a woman whose elegance plays well in the circus ring as she clings to the lyra and dances in mid-air, now working as a checkout clerk at the local grocery store, or as a teller in a bank.  Imagine the children, suddenly ripped away from the circus family/community they knew, where they were either homeschooled or schooled in small groups, now having to “fit in” at school when their biggest skill is knowing how to put on stage makeup and balance on enormous rubber balls while juggling clubs that are bigger than their legs.

Absolutely devastating.

Of course there are still circuses traveling out there. Most are small, some mid-sized, but few the size of Ringling.  One big one, the UniverSoul circus, has limited travel and audience by its nature.  Cirque du Soleil, who some would argue is circus, is not circus, but simple street performance art (sorry, Cirque fans).  There are more performers being let go from Ringling than UniverSoul can take in, and the smaller show are already full of performers.  What is left for these people?

I know there are those out there that may not think that circus is legitimate, and that the performers are not legitimate either.  But they are.  This has been a serious line of work for tens of thousands of people over time.  They do the work they love, the work they know, the work they are good at, and make people gasp, smile, clap, jump to their feet, and live for a few moments in a magical world where gravity doesn’t count, defying death is a matter of routine, and the sparkles are only matched by the wonder in the children’s eyes.  How many of us have thrilled at the expression of power exhibited in a spirited ride of the Cassock Riders, thundering their horses around the ring at breakneck speeds?  How many of us have looked up at that man on the sway poles, wondering how on earth he stays up there with all that swinging and twirling?  How many of us have watched a dual silk act full of romance and incredible emotion, bolstered by sweeping, intense music?  How many of us have marveled at the sheer size of an Asian or African elephant, while also noticing the kindness in its eyes?  How many of us have laughed until we hurt at the antics of the funny men and women in the circus – the clowns?

The closing of Ringling stabs us all in the heart.  Being able to say you were a performer for Ringling was a badge of honor, something you bragged about, something you aspired to.  Ringling performers often went on to tour with other circuses, bringing their talents and experience to smaller shows, entertaining more and more people every year.  I know a lot of these people through my marriage to a Ringling clown.  It hurts me a great deal to see their lives ripped out from under them.

So now what?  If you care at all for these people’s lives, then don’t stop loving circus.  While Ringling still won’t be around, there are plenty of other circuses that ARE around.  I’m including a list of them below, along with information on Circus World Museum in Baraboo, Wisconsin, the one-time home of the actual Ringling brothers (yes, they were actual people!) and information on the Ringling Museum and dCa’ d’Zan, in Sarasota, Florida.  Want to keep circus alive?  Visit the circus.  And the institutions that honor them.

Carson and Barnes Circus

Kelly Miller Cicus

Culpepper and Merriweather Circus

Circus Vargas

Zoppe Family Circus

Circus Flora

Circus Hermano Vasquez

Places to visit about circus:

Circus World Museum, Baraboo, Wisconsin

The Ringling Circus Museum, Sarasota, Florida (also includes a tour of the mansion Ca’ d’Zan, former home of John and Mabel Ringling)


Posted on January 21st, 2017 by Momilies  |  Comments Off on The End of Magic

Resolutions

Good grief it’s been three months since I blogged!  Fall has not been kind to me, and I’ve been busier than I’d like. But the new year is upon us, and it’s time for me to figure out how I’m going to do things this year.  Time for my list of resolutions!  (For the record, I’m pretty good at keeping resolutions.)

1. Get back on my book-reading schedule.  Two books a month.  I know that sounds light to some of my more heavy-reading friends, but I have a busy life and do lots of things, so reading time isn’t always going to fit in where I’d like.

2. Get back on my bike.  Not right now, because we are looking at some pretty frigid temps in the coming week, but on  days when it tops 50, I need to load up the bike and get out to the bike path.  I’ll be taking Tater with me.   I bought a new bike this fall, so I could pass my current bike down to Tater, who has gotten too tall for her “junior” bike.  But I’ve only been on it a couple of times so far.  Shame on me!

3. Spend some good time getting up to speed on craft fairs for the year.  I’m doing good building inventory, but now I need to plan for where and how to sell.  I have a friend who does shows, so I’ve been picking her brain and looking for events in the area.  I enjoyed the one craft fair I did this past fall, even though I only did a little better than break even.  I’m looking forward to doing more of them.

4. Get back to writing.  I need a daily schedule and need to stick to it.  Writing doesn’t happen without hard work and fingers on the keyboard.  I have stories to write, I just need to WRITE them.  Also, I need to finish the plotting bootcamp materials.  I didn’t finish the course as strong as I would have liked.  I kept all of the materials and it’s a matter of sitting and going through them, and finishing it.

5. Find more local friends.  There are a couple of local groups that I’ve not gotten involved in but should.  I would love to find a thrifting buddy or two, and a discussion or social group for women over 50.  This has always been difficult for me, as I am an older mom and still have a school age kid at home.  I also work full time, and many of the groups I find have daytime activities, which I can’t attend.

That’s probably enough to work with.  I’m looking forward to 2017 as a “new leaf” year.  I am ten years from retirement.  I need to start figuring out who I am and what motivates and pleases me, and add those things into my life.  2016 was not a banner year for me in some ways, and I don’t want a repeat for 2017.

What are your resolutions this year?

Posted on January 1st, 2017 by Momilies  |  Comments Off on Resolutions

Garden Wild

I love looking at gardening magazines.  The crammed-full veggie gardens with a profusion of herbs, cabbages, tiny cherry tomatoes, and flowers, the pretty raised beds full of variety lettuces and carrot tops.  It all looks so fresh and healthy and productive.  And disorderly.
I was raised with orderly gardens.  Rows of beans with space to walk between, tomatoes tied to stakes and with their bottoms trimmed closely, with the fruit easy to reach and pick.  So, when I garden, I follow that pattern.  I trim back the tomatoes, I place boards in between rows so I don’t have to walk in mud, and flowers are never part of my veggie gardens.  It is neat and orderly, almost regimental.  It is also a lot of work.

This year, the busiest year I’ve had in a long time, I didn’t have time to keep things neat and tidy.  I pulled weeds when I could, but mostly, I threw seeds at the ground, set a sprinkler to run, and hoped for the best.  I planted some sad-looking, discount-priced zinnias along the edge to disguise my crooked garden edging. I never considered it my best effort, and in quiet moments, I fretted about my lack of care to the food I had hoped would feed us.

But you know what?  It all turned out okay in the end.  I have gardens that look like those ones in the magazines.  They are crammed full, producing wildly, and those sad little zinnias look intentional and gorgeous holding it all in.  I’ve harvested pounds and pounds of squash, tomatoes, lettuce, kale, beans, eggplant, and cucumbers.  I’ve made so much pesto I’m surprised my eyes aren’t green.  My freezer is crammed with baba ganoush, shredded summer squash, green beans, kale, and kohlrabi that we will eat all winter.  I canned three dozen pint jars of tomatoes.  Even this late in the season, I’m still getting squash and tomatoes, albeit much more slowly, and my basil is four feet high and attracting so many honey bees that I don’t dare cut it down.

My lack of care this year still left me with a well-producing garden.  A wild-looking garden, but productive nonetheless.  Have I been doing it wrong all this time?

How did your garden grow this year?

Basil, parsley, purple beans, pole beans, kale, and zinnias. 

20160828_190842

Tomatoes, eggplant, cucumbers, purple beans, a volunteer pumpkin hiding under the tomatoes.

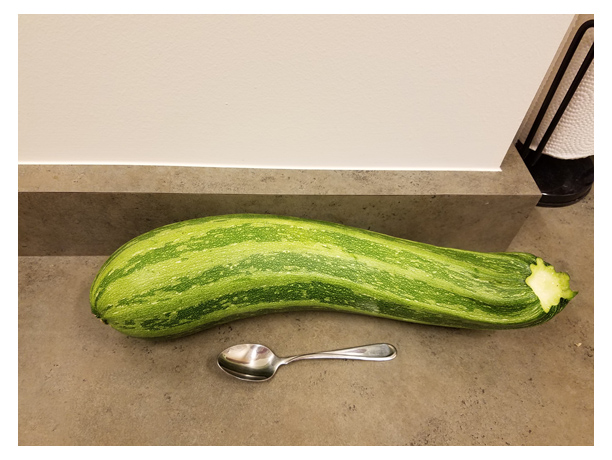
2016falltomatoes2Squash.  Only two plants in this bed – a Buckingham (yellow zuch) and Cocozelle (striped green zuch).  There are also cabbages, beets, and turnips in this space, although most have been harvested already.

2016fallsquashThe squash were out of hand!

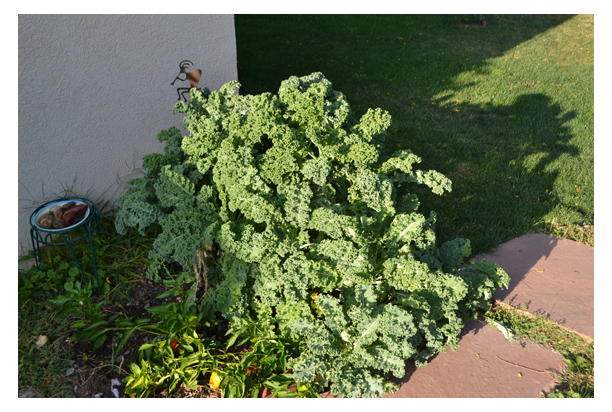
2016fallzuchKale.  We ate a lot of it! There are some sad little peppers laying on the ground next to them.
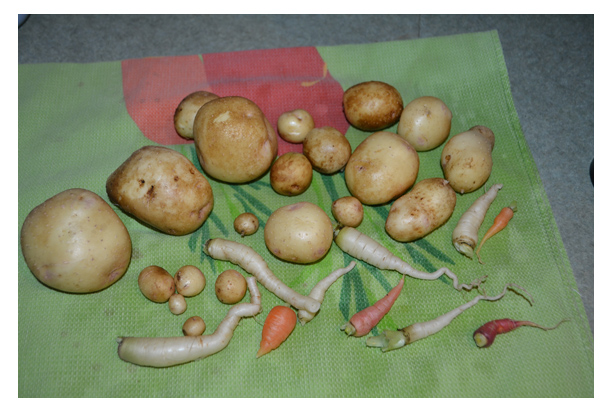
2016fallkalePotatoes.  These were grown in the shade so I’m not complaining.  They were cooked in one batch with green beans and onions.  Tasty!  The tiny carrots we just ate raw with lunch one day.

2016fallpotatoesLate in the summer, the kale got cruciferus aphids.  Bummed me out.  I will be watching for them next year, and spraying them with soap to kill them off before they ruin the kale.

2016fallkaleaphidsBees! They love my basil.

2016fallbeesButterflies too!

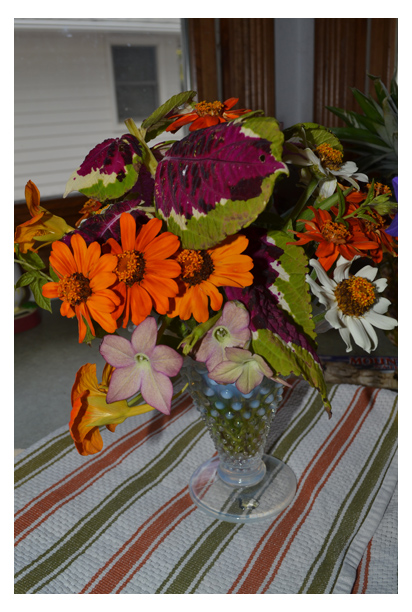
2016fallbutterfly Flowers – zinnias, a coleus, nicotania, nasturtiums, and others I don’t know the names of.

2016fallflowerrsFlowers in pots by the garage.  I do love my color!  The little begonia on the left is a much-propagated cutting from my great grandmother’s plant. 

2016fallflowerpotsOne more view of the garden along the house. 

2016fallbasil

Posted on October 15th, 2016 by Momilies  |  2 Comments »

He Called Her Pamela

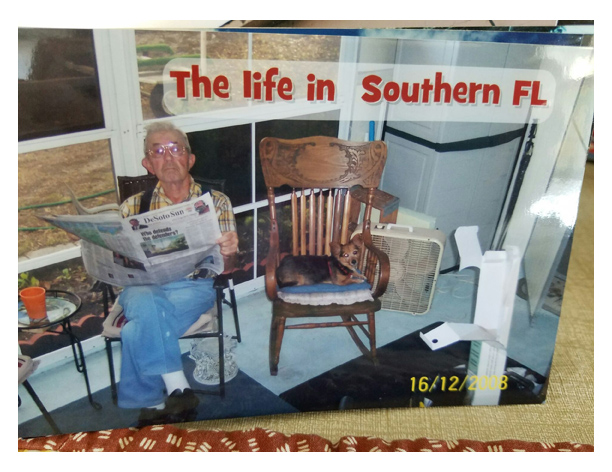
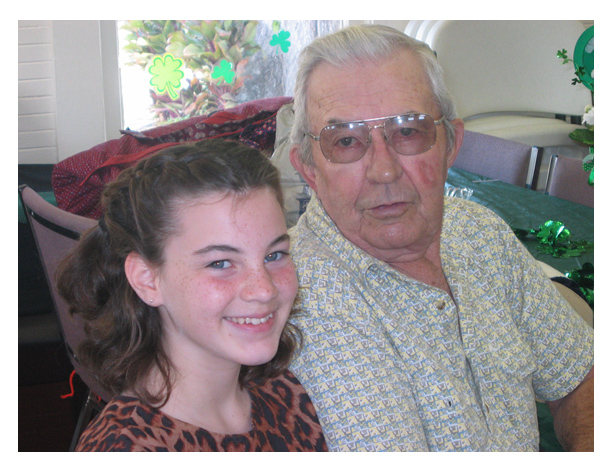
dd2The last month or so has been an emotional roller-coaster for my mother, and by extension, me.  Last Friday, September 9th, our hearts were both eased when her significant other of more than 25 years was able to peacefully pass into his final rest.  Dewey was 87 years old, and died from complications after surgery on an abdominal aneurysm.

He called her Pamela.  The only names I’d ever known my mother by were Mom, Pam, and Meemaw/Grandma.  I had never heard anyone call her by her “big name.”  He would be trying to explain something to her, or calm her down when she was in a tizzy.  “Now, Pamela,” he’d say, with the patience of a stone.  When I hear him talk in my mind, I hear him say that to her.  And it makes me smile.

dd1Dewey was a good man.  He and my mother were never married, but they were companions for so long that they might as well have been. They owned property together over the years, traveled all over the United States, retired together to Florida, where they still traveled and enjoyed each other’s company.  He was my mother’s “port in a storm,” and the person she talked to the most.

dd3He loved fiercely.  He loved his kids and grandkids, even his pseudo grandkids (my children).  He loved their little dog, Willy.  He loved my mother.  He could make my kids belly laugh with a silly face or a “boogety-boogety” shaking of his lips.  He was a tinker, and my son would follow him around learning how to fix things or build things.  He was generous to a fault, a trite phrase, I know, but it is so true.  He would buy things for us, make sure my mom was always comfortable, took my kids out to eat.

Dewey

He served in the Korean War, and read voraciously.  I would often send a box of books – always nonfiction biographies or history – and he would call me to thank me.  The Perfect Child had subscriptions to Popular Mechanics and Popular Science, and we’d pass those on to him when we were done with them.  I have a small stack of them, and a couple books, right now in my storage room, that I was gathering to send him.  Throughout his life he had been many things – a butcher, worked in construction, did maintenance work at a university.

But he was always a good man.  A kind man.  A man more men should be like.  I and my kids will miss him in our lives.  I cannot help but to remember him with a smile, although the tears flow today, they will not flow forever.

They say your legacy will be how they remember you.  I will remember him as kind, good, honest, and caring.

RIP Dewey.  Thank you for all you did for us.

dd5

Posted on September 17th, 2016 by Momilies  |  3 Comments »

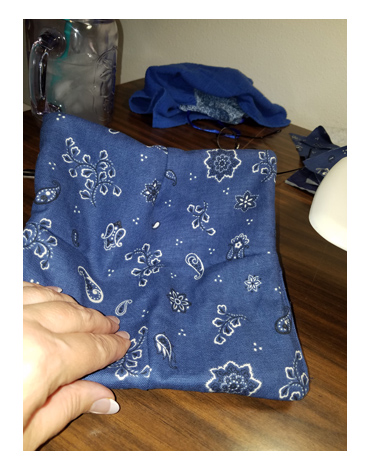
Bowl Lifters

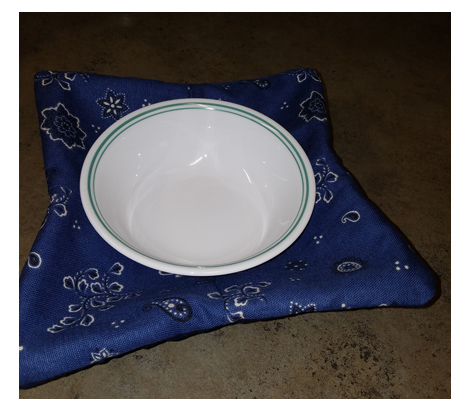
Bowl Lifter

I’ve had a couple of requests for the instructions for making these.  I like to give them as gifts, and they are a quick project to put together.  You don’t even need to go to the fabric store, since you may have what you need for this project right in your own stash!  What is a “bowl lifter,” you ask?  It is a nifty cloth holder to go under your bowl when you put it in the microwave, and you can lift your too-hot-to-touch food by the corners of the “lifter” and not burn your hands.  It’s also a cozy way to hold a bowl of soup or something else warm while sitting outside by a fire.  And for those of you in warm places, it’s a great tool for holding that freezing bowl of ice cream so your fingers don’t get cold!

I promise, these are simple to make.  They go quickly, too.  I can usually do a set of four in an hour.  They make great housewarming gifts, or “I’m thinking of you” gifts.  They also sell well at craft fairs, and because the materials are cheap or “found,” they don’t cost much to make.  That’s a win-win, right?

There are lots of pictures in this post, but I wanted to give clear instructions.  Please feel free to comment if you need better instructions.  I read all comments!  Also, if you like this tutorial, please share this blog address!

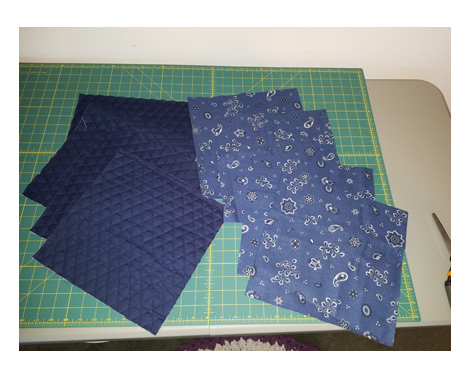
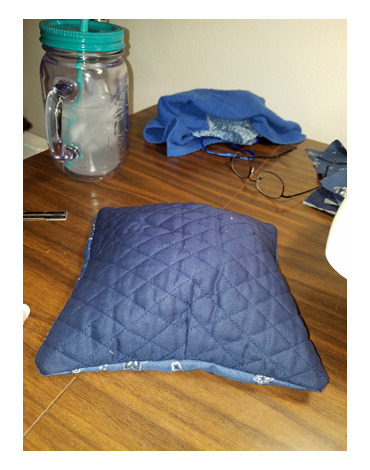
Let’s talk first about fabric. I’ve seen these made with all kinds of things – terrycloth, simple cotton, old quilt pieces, you name it.  After making several, I came to the conclusion that I wanted a certain look for my lifters.  They need to keep their “shape” and cup around the bowl without me having to hold it there.  That meant taking some care with my fabrics.  So, I prefer a duck-style fabric for the top, and the bottom will be a cotton-covered batting.  The fabric-covered batting goes on sale pretty often, and I buy it several yards at a time, in a color that I know I will use.  Right now I have a selection of navy blue, chocolate brown, black, cream, and light brown.  The duck I buy as remnants or find at thrift stores.  The fabric in this tutorial came from the thrift store and cost a dollar.  There was enough fabric to make four bowl lifters.   Oftentimes, I can find small pieces of duck that will work great for this project.  Vintage is even better, which is what this blue “bandana” fabric is. It is a nice sturdy duck.

Whatever fabric you choose, be sure it is cotton, and washable.  These lifters can get dirty with spilled food, so they need to be washable.

Bowl Lifter fabric


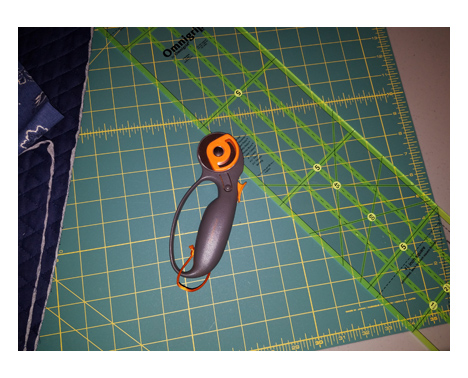
You will need enough fabric to make 11-inch squares.  I’ve experimented with other sizes.  You can go a bit smaller, but bigger becomes unwieldy for its intended use.  I’m making a set of four, so I needed fabric that was at least 22 inches long, and 44 inches wide.  Most fabric is 42-44 inches wide, including the quilted fabric I buy.  So one 22-inch cut of quilted fabric will give me four bottoms.  As with anything, use the right tools for the job.  I cut these with my self-healing cutting board, a quilt ruler, and my rotary cutter.  Grain is not super-important on this project – I treat it like I do quilting.  I pretty much ignore the grain.  These work out fine regardless.  I’ve never made less than 2 bowl lifters, although I suppose I could give a single one to a single person.  I use the ones that were made for me, so one is always dirty.  I like having at least two.

the right tools for the job - self-healing quilt cutting board, ruler, and rotary cutter


So the construction works with darts, and some seams.  Pretty basic.  The darts are what create the “crater” in the middle intended to hold your bowl.  The darts don’t have to be perfect or pretty, but it helps to make them all the same.  Randomly, I settled on 3-inch darts, but these seem to work well.  Fold your fabric square in half, right sides together.  Make a small mark with a marking pen or sharpie (make sure it doesn’t bleed through!) 3 inches from the raw edge, on the fold.  Do this for both ends of your folded square.  Then unfold your square and fold it the opposite way (90 degrees from where you just folded), and mark again.

bowllifter04Dart Marks for bowl lifters

When you get done you should have something that looks like this:

Dart marksDo the same with the backing fabric.  Remember that you will be sewing darts with right sides together, so only mark on the back of your fabric.  For the double-fabric batting, both right and wrong sides look the same.

Now it’s time to sew!  Fold your fabric in half again, right sides together.  I find I don’t need to pin, but if you feel the need to pin, do so.  The duck is pretty easy to work with and I don’t find it sliding around too much.  Also, this is not a “fussy” project and small mistakes are not going to show.  In other words, just go with it!  Place your fabric under your pressure foot and be sure your seam width is at least 1/4th inch.  Mine gives me a 3/8ths inch width, which is fine as well.  Line up the right side of your presser foot with the edge of your fabric (see picture).

Sewing the dart

Using a medium stitch, sew towards your mark, creating a diagonal line of stitching down to the end of the dart.  Back stitch at the end of the dart.  Repeat on the other end of the fold, then open the fabric and refold the opposite way.  Create both darts.  When finished, you should have four darts, each in the center of the sides.

Finished dart

The “bowl” shape is already taking affect!  Repeat these steps with the backing fabric.  Trim all your threads.

bowl lifter after dartsBowl lifter after dartsPut the back and the front right sides together. Again, if you feel the need to pin, do so.  I am not much of a fussy sewist, so I just go with it.  I usually do a 3/8ths inch seam for these.  Starting in the middle of one side (near a dart), I start stitching, turning sharp corners.  When I get to the fourth corner, I turn the corner, but only sew about 3/5ths of an inch, then back stitch a bit.  Remove the piece from the sewing machine and trim threads.  Bowl lifter after seamsbowllifter13Make sure you trim the corners!

bowllifter14

Using the opening you left, turn the fabric pocket right side out.  I usually just reach in with two fingers and grab the furthest corner, working it all through.  Once you have it pulled through, take time to poke out the corners.  I use my fingers, but you can use the end of a pen or a large crochet needle. When you have it completely turned, you will need to stitch up the opening you left for turning.

Bowl lifter with openingYou can do this by hand, but you should do it by machine for sturdiness.  Fold in the edges and smooth tightly with your fingers. Stitching as close to the edge as possible, stitch that remaining opening closed.  You can also top-stitch all the way around, if you like, but I find the bulk of these makes it difficult to get a nice straight line.

bowllifter16And voila, you have your very own bowl lifter!

bowllifter17bowllifter18


Posted on August 28th, 2016 by Momilies  |  1 Comment »

My New Favorite Pot

I collect the weirdest things sometimes.  Chicken figurines.  Placemats.  Porcelain pans.  Potted plants.  Worn out quilts.

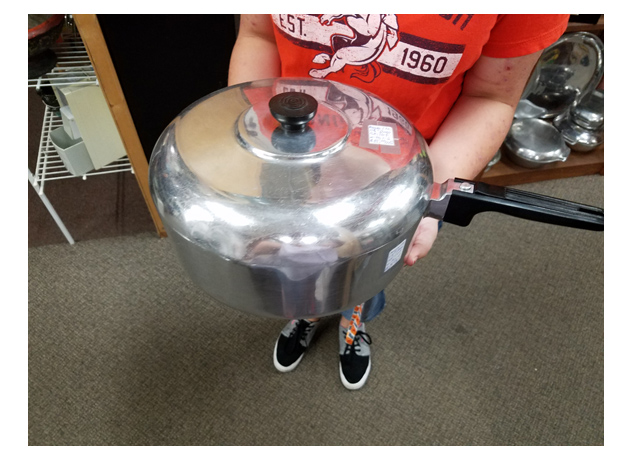
My favorite potAnd pots of a certain type.  I fell in love with this style of pot/pan many years ago, when I stumbled upon one at a thrift store some 30 years ago.  That pot is still in my possession and gets used regularly.  I paid $8 for it.  I’ve since added at least six others:  a small saucepan, a small oval roaster, a mid-sized saucepan, and a very large roaster.  They are all still my go-to pots for everything from boiling potatoes to making stove-top pot-roast and roasted fowl.  When I find one for sale, there is a good ten minute back-and-forth discussion with myself about whether or not I should buy it.

And the answer is usually yes.

What is so special about these?  They are thick cast aluminum, similar to a pressure canner or pressure cooker.  They have a variety of brand names as the company has changed over the years, but they are all the same manufacturer.  They go by MagnaWare, Wearever and Ware.  All of my pots boast one of these brand names.  The newer ones are Magna Ware.  The older ones carry the Ware or Wearever name.

These pots are heavy.  They distribute heat beautifully.  The caramelize an onion on low heat like nothing you’ve ever seen.  Their heavy lids hold in moisture, something critical in the dry environment I live in.  The handles are composite or wood (depending on the age of the pot) and don’t get hot.  I have made countless batches stews, pot roasts, soups, mashed potatoes, kale, cabbage, you name it.  I have never had a failed dish in one of these.

My newest acquisition is a 12″ deep fry pan.  It is at this moment my favorite pot.  I have made pork chops and cabbage, mushroom steak, strawberry jam, kale and bacon, cabbage and bacon, mashed potatoes, and soup.  I use it at least once a week, but if I’m cooking a lot, it gets used 3 or 4 times a week.  I LOVE this pot.  The single handle makes it easy to move the pot around and to empty it if needed.  The heavy lid seals in moisture and provides the best result of my cooking.

The bonus?  I found it at a flea market, marked for $35.  This pan would have been over $150 brand new in the store.  My big roaster would have been about $250, but I paid $35 for it at a church rummage sale.  I’d have gladly paid more.  Sometimes, I get a wild hair and look at other cookware.  But I always turn away when I see how cheap, flimsy, thin, and brittle they are.

Give me my Wearever any day. :)

Do you have a favorite pot or pots?  What do you like about them?

Posted on August 13th, 2016 by Momilies  |  2 Comments »

New Toy

Earlier this month, my oldest-youngest brother came to visit for a couple of days.  He was traveling to a blacksmith’s convention in Salt Lake City.  We were naturally a perfect stop along the way.  The older I get, the more I appreciate my siblings.  Sometimes, I really regret being so far away, but then I’ll get a nice visit, or be able to make a trip home, and it is all better.

My brother is an interesting and busy guy, kind of like me.  He travels for work, but also travels for fun.  He is the one of us who has the most wandering feet.  The travel for his job helps keep those feet happy, yet he has a house, and a big workshop, that he spends his free time in.  He’s been blacksmithing for close to 20 years, I think.  And his most recent hobby is working on old sewing machines.  Not sort-of old.  Old. Treadle machines, some early electric machines.  He knows more about sewing machines and how they work than I could ever catalog.  He buys them, fixes them up, and then either sells them or gifts them.  He always has a handful in various stages of rebuilding.  I got to see some of them at Christmas when I went home for my dad’s birthday.

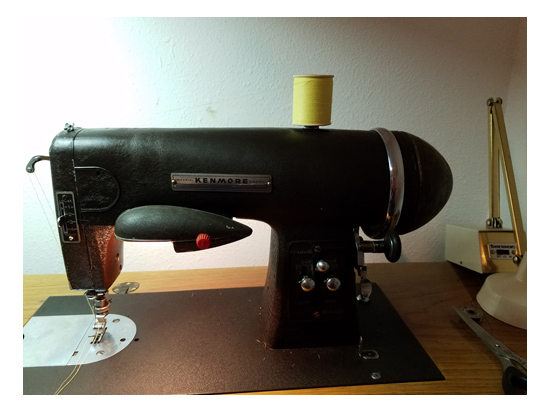
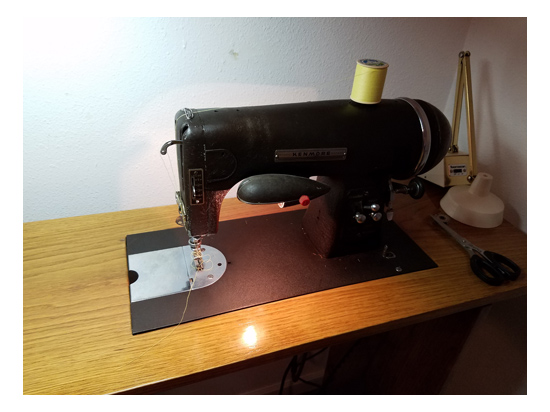
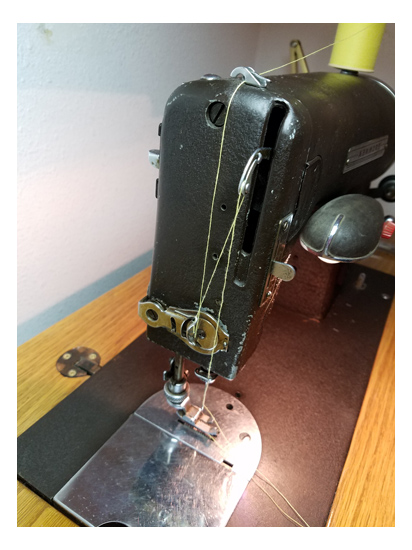
Kenmore art deco sewing machineAnd this year, for my birthday, he gave me the one machine I had pretty much slobbered over.  It is an art-deco masterpiece.  And it runs like a dream. My mother brought it with her when she came in late May, and I set it up in the sewing room but because of all the shuffling around and the fact that that room was being used as someone’s bedroom, I didn’t have a chance to play with it until after my brother’s visit some 7 weeks later.  I am in love with this machine.  That is despite the fact that the threading pattern is crazy and not quite what I expected, and that putting a bobbin in takes some acrobatic hand maneuvering.

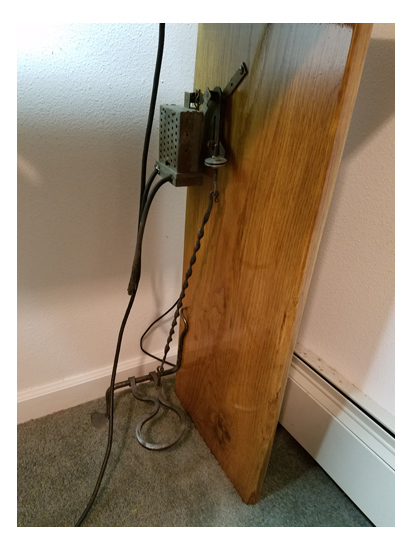
It sewed through the thickness of a flannel baby quilt with extreme batting, and didn’t skip a stitch.  It stitches so smoothly that the table barely vibrates.  It is set in a custom-made hard-wood table my brother built for it.  The table was built for his height (he is well over 6 foot tall) but works fine for me.  In his blacksmith shop, he hand-made the pedal assembly.  This thing is so much fun to sew on, that I’ve been looking for projects to work on!  Not that I don’t already have enough of them!

Spending time with my brother a few weeks ago was wonderful.  And I won’t be able to sit down at this machine without thinking about those wonderful two days.  I may be biased, but my brother is amazing. :)

The art shot…all shiny!

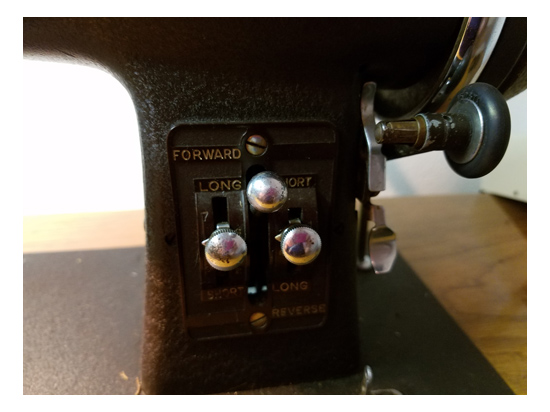
Kenmore art-deco sewing machineYou only get frontward and backward, but you can set the stitch length for each one separately.  Kind of a nifty trick!

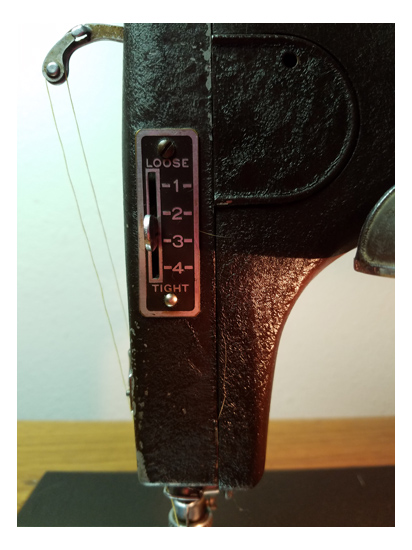
Kenmore art-deco sewing machineTension adjustment. 

Kenmre art-deco sewing machineCrazy threading pattern.  Fortunately, my brother found instructions and included a copy of them with the little tin of tools and feet.

Kenmre art-deco sewing machine

The hand-made pedal assembly.

Kenmre art-deco sewing machine

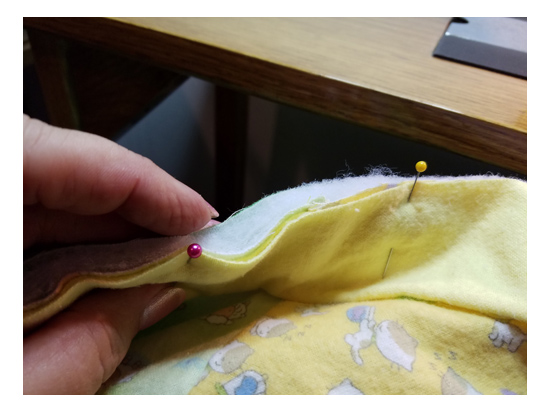
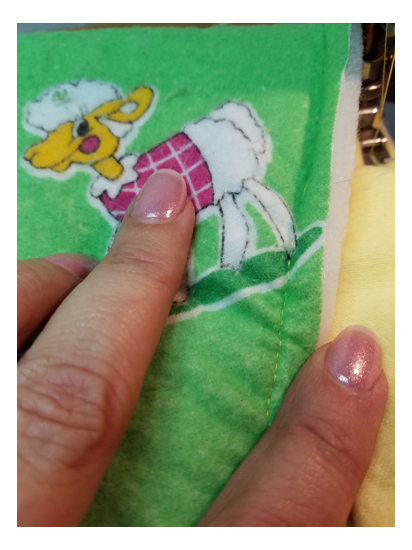
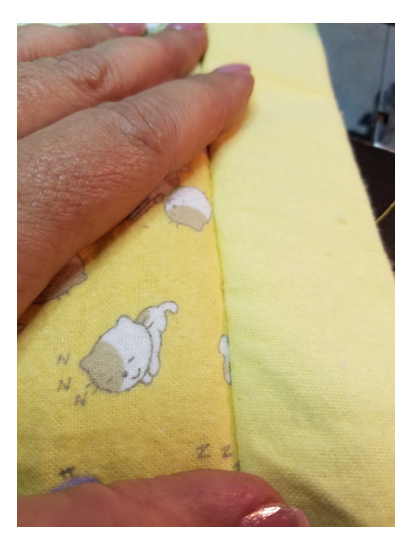
The baby quilt pics…you can see how thick the fabric was, and it sewed it just fine! This baby quilt went to the new mom and dad  who lives across the street from us.  Emily and Matthew’s baby boy Grayson was born on July 7th.

Baby quilt stitchingBaby quilt stitching

Baby quilt stitchingIf you got this far…I’d love to hear about some wonderful gift you’ve received from a family member, or maybe you have a story about your sibling(s) you’d like to share.  Leave it in the comments!


Posted on July 31st, 2016 by Momilies  |  2 Comments »