Raspberry Syrup
Oh, summer. You’re such a tease! All the fresh fruit, the fresh veggies. I want to eat them all, right at once. Which of course is silly, but soooooo tempting. So I have to make sure I’m not just eating some of the wonderful things, but putting some of the wonderful things away for the winter months, when the “fresh” fruits and veggies don’t really taste all that great. Last week I shared with you my peach jam and peach cobbler. This week, I thought I’d talk about Raspberry Syrup. It’s easier than you think to do! And in January, when you’re fixing waffles on a snowy Sunday morning, you’ll have a wonderful taste of summer to drizzle on top.
(Sorry for the terrible pictures, the kitchen was pretty hot and my camera was having trouble focusing)
This is an easy recipe, but does take some watching, so do this when you have time to hang out in the kitchen. I suggest a decent novel, or maybe working on several cooking projects at once. When you cook this, you don’t want to walk away. Watch for raspberries to go on sale, and then buy a bunch. They regularly go on sale here for $1 or less for a 6 oz. carton. Pick cartons that are stuffed, so you get the most for you buck. 8 6 oz. containers will make about a quart of syrup, give or take. I usually preserve it in 4-oz. containers, because it will turn to sugar if open too long after you open the jars. A 4 oz. container is enough for my family to have on waffles for one meal, with only a little leftover. I sometimes use the leftover syrup on a bowl of oatmeal, or mixed in with a couple tablespoons of cream cheese on a bagel. Yummo!
A Definition: syrup is different than a jam. Usually there is less sugar, and the goal is a clear slightly-thickened juice, not a jelly. But like making jelly or jam, you need a big pot, a big spoon, and some patience.
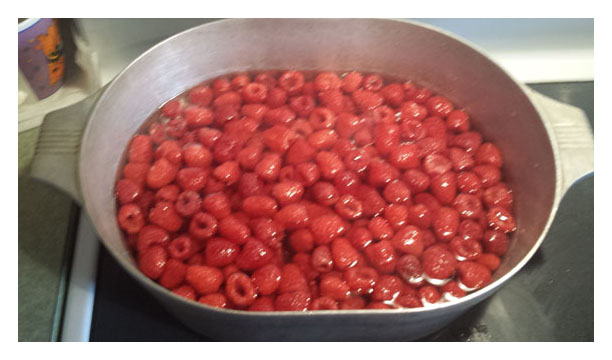 So, dig out that big pot. It needs to be deep, because this will boil up and make a mess if you have a pot that is too small. And there’s nothing messier to clean up than boiled/burned sugar on your stovetop! Pick any leaves or debris out of the raspberries and toss them in the pot. Do NOT wash them. They are clean enough for this, and washing raspberries makes them absorb liquid and deteriorate. You want all that flavor in your syrup! Add about a cup of white sugar, and about a cup and a half of water. Turn the burner on and bring to a boil. You can use a lid to speed the boil process, but once it reaches a boil, you want to remove the lid, and start stirring every once in a while. You’ll also want to turn the heat down to about medium.
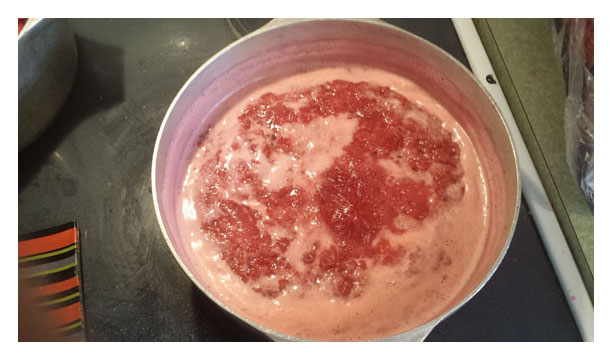 Allow this to cook for at about 30 minutes, stirring frequently. The goal is to cook this down by half. You will need to stir more the longer it cooks, to keep it from sticking. You will know it is pretty much ready when it is sticking even with the stirring. At that point, get it off the heat and let it cool for ten or fifteen minutes, so it is easier to handle. Hot sugary things can burn you in nothing flat. The foam you see on the picture to the left? That was mostly gone by the time the syrup was fully cooked. It will get strained out when you move to the next step, however, so don’t fret over it too much.
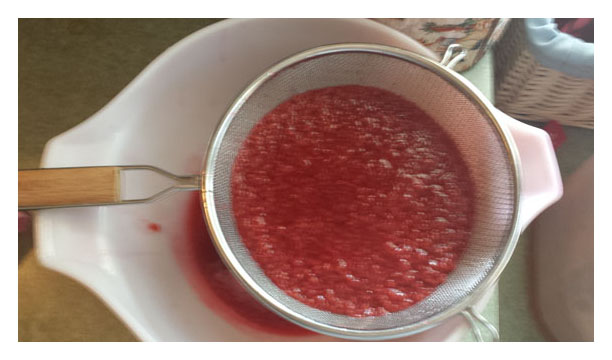 Now you have two ways to go with this. You can strain the raspberry mixture through a strainer to remove the seeds and pulp, or you can tie cheesecloth over a bowl and pour in the raspberry mixture, letting it sit overnight to strain all the way through. With a strainer, the juice will be a little cloudier, which I don’t think is a problem, but some people want their syrup clear. This is your choice.
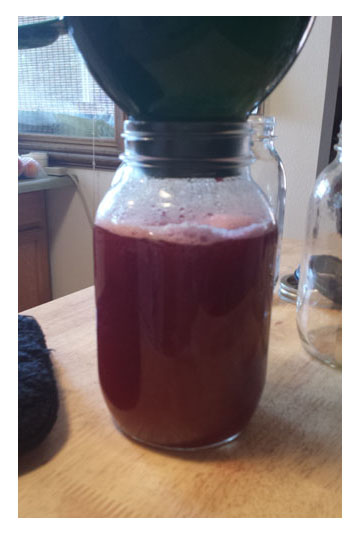
To preserve, you can freeze in small jars, or fill 4 oz. jars with syrup, leaving about a half inch of head space, and process in a hot water bath for 10 minutes (low altitude) or 15 minutes (high altitude). Store in a cool, dry place until use.
Enjoy on those waffles, pancakes, biscuits, fresh bread, etc. come winter. I promise it will make you smile!
(Some may note that I am putting my syrup in quart jars. This is because mine goes into the freezer when I make it, to be canned later when the temps are cooler and therefore canning in the kitchen isn’t an awful proposition.)